How to Design Solar PV System
What is solar PV system?
Solar photovoltaic system or Solar power system is one of renewable energy system which uses PV modules to convert sunlight into electricity. The electricity generated can be either stored or used directly, fed back into grid line or combined with one or more other electricity generators or more renewable energy source. Solar PV system is very reliable and clean source of electricity that can suit a wide range of applications such as residence, industry, agriculture, livestock, etc.
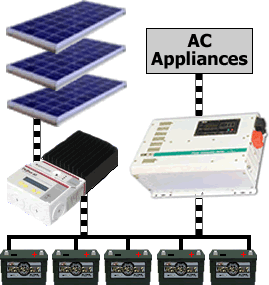
Major system components
Solar PV system includes different components that should be selected according to your system type, site location and applications. The major components for solar PV system are solar charge controller, inverter, battery bank, auxiliary energy sources and loads (appliances).
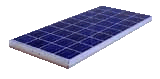
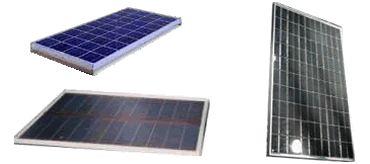
• PV module – converts sunlight into DC electricity.
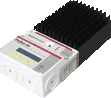
• Solar charge controller – regulates the voltage and current coming from the PV panels going to
battery and prevents battery overcharging and prolongs the battery life.
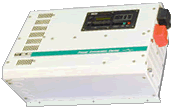
• Inverter – converts DC output of PV panels or wind turbine into a clean AC current for AC
appliances or fed back into grid line.
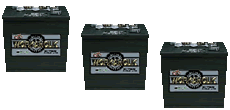
• Battery – stores energy for supplying to electrical appliances when there is a demand.
• Load – is electrical appliances that connected to solar PV system such as lights, radio, TV, computer,
refrigerator, etc.
• Auxiliary energy sources - is diesel generator or other renewable energy sources.
Solar PV system sizing
1. Determine power consumption demands
The first step in designing a solar PV system is to find out the total power and energy consumption of all loads that need to be supplied by the solar PV system as follows:
1.1 Calculate total Watt-hours per day for each appliance used.
Add the Watt-hours needed for all appliances together to get the total Watt-hours per day which
must be delivered to the appliances.
1.2 Calculate total Watt-hours per day needed from the PV modules.
Multiply the total appliances Watt-hours per day times 1.3 (the energy lost in the system) to get
the total Watt-hours per day which must be provided by the panels.
2. Size the PV modules
Different size of PV modules will produce different amount of power. To find out the sizing of PV module, the total peak watt produced needs. The peak watt (Wp) produced depends on size of the PV module and climate of site location. We have to consider “panel generation factor” which is different in each site location. For Thailand, the panel generation factor is 3.43. To determine the sizing of PV modules, calculate as follows:
2.1 Calculate the total Watt-peak rating needed for PV modules
Divide the total Watt-hours per day needed from the PV modules (from item 1.2) by 3.43 to get
the total Watt-peak rating needed for the PV panels needed to operate the appliances.
2.2 Calculate the number of PV panels for the system
Divide the answer obtained in item 2.1 by the rated output Watt-peak of the PV modules available
to you. Increase any fractional part of result to the next highest full number and that will be the
number of PV modules required.
Result of the calculation is the minimum number of PV panels. If more PV modules are installed, the system will perform better and battery life will be improved. If fewer PV modules are used, the system may not work at all during cloudy periods and battery life will be shortened.
3. Inverter sizing
An inverter is used in the system where AC power output is needed. The input rating of the inverter should never be lower than the total watt of appliances. The inverter must have the same nominal voltage as your battery.
For stand-alone systems, the inverter must be large enough to handle the total amount of Watts you will be using at one time. The inverter size should be 25-30% bigger than total Watts of appliances. In case of appliance type is motor or compressor then inverter size should be minimum 3 times the capacity of those appliances and must be added to the inverter capacity to handle surge current during starting.
For grid tie systems or grid connected systems, the input rating of the inverter should be same as PV array rating to allow for safe and efficient operation.
4. Battery sizing
The battery type recommended for using in solar PV system is deep cycle battery. Deep cycle battery is specifically designed for to be discharged to low energy level and rapid recharged or cycle charged and discharged day after day for years. The battery should be large enough to store sufficient energy to operate the appliances at night and cloudy days. To find out the size of battery, calculate as follows:
4.1 Calculate total Watt-hours per day used by appliances.
4.2 Divide the total Watt-hours per day used by 0.85 for battery loss.
4.3 Divide the answer obtained in item 4.2 by 0.6 for depth of discharge.
4.4 Divide the answer obtained in item 4.3 by the nominal battery voltage.
4.5 Multiply the answer obtained in item 4.4 with days of autonomy (the number of days that you
need the system to operate when there is no power produced by PV panels) to get the required
Ampere-hour capacity of deep-cycle battery.
Battery Capacity (Ah) = Total Watt-hours per day used by appliances x Days of autonomy
(0.85 x 0.6 x nominal battery voltage)
5. Solar charge controller sizing
The solar charge controller is typically rated against Amperage and Voltage capacities. Select the solar charge controller to match the voltage of PV array and batteries and then identify which type of solar charge controller is right for your application. Make sure that solar charge controller has enough capacity to handle the current from PV array.
For the series charge controller type, the sizing of controller depends on the total PV input current which is delivered to the controller and also depends on PV panel configuration (series or parallel configuration).
According to standard practice, the sizing of solar charge controller is to take the short circuit current (Isc) of the PV array, and multiply it by 1.3
Solar charge controller rating = Total short circuit current of PV array x 1.3
Remark: For MPPT charge controller sizing will be different. (See Basics of MPPT Charge Controller)
Example: A house has the following electrical appliance usage:
One 18 Watt fluorescent lamp with electronic ballast used 4 hours per day.
One 60 Watt fan used for 2 hours per day.
One 75 Watt refrigerator that runs 24 hours per day with compressor run 12 hours and off 12 hours.
The system will be powered by 12 Vdc, 110 Wp PV module.
1. Determine power consumption demands
Total appliance use = (18 W x 4 hours) + (60 W x 2 hours) + (75 W x 24 x 0.5 hours)
= 1,092 Wh/day
Total PV panels energy needed = 1,092 x 1.3
= 1,419.6 Wh/day.
2. Size the PV panel
2.1 Total Wp of PV panel capacity
needed = 1,419.6 / 3.4
= 413.9 Wp
2.2 Number of PV panels needed = 413.9 / 110
= 3.76 modules
Actual requirement = 4 modules
So this system should be powered by at least 4 modules of 110 Wp PV module.
3. Inverter sizing
Total Watt of all appliances = 18 + 60 + 75 = 153 W
For safety, the inverter should be considered 25-30% bigger size.
The inverter size should be about 190 W or greater.
4. Battery sizing
Total appliances use = (18 W x 4 hours) + (60 W x 2 hours) + (75 W x 12 hours)
Nominal battery voltage = 12 V
Days of autonomy = 3 days
Battery capacity = [(18 W x 4 hours) + (60 W x 2 hours) + (75 W x 12 hours)] x 3
(0.85 x 0.6 x 12)
Total Ampere-hours required 535.29 Ah
So the battery should be rated 12 V 600 Ah for 3 day autonomy.
5. Solar charge controller sizing
PV module specification
Pm = 110 Wp
Vm = 16.7 Vdc
Im = 6.6 A
Voc = 20.7 A
Isc = 7.5 A
Solar charge controller rating = (4 strings x 7.5 A) x 1.3 = 39 A
So the solar charge controller should be rated 40 A at 12 V or greater.
Basics about PV off-grid systems
Diagrams of PV off-grid systems
Homes/cottages (12/24V systems) Campers (12/24V systems) Classical autonomous PV off-grid system
(converting 12/24/48V to 230V/50Hz)
Contains Contains Contains
PV solar panels
Charge controller
Lighting, TV, freezer (optionally)
Batteries PV solar panels
Charge controller
Lighting, TV, freezer (optionally)
Batteries PV solar panels
Charge controller
Inverter 230V/50Hz or 110V/60Hz
Batteries
In general: the simpler the system, the better.
Worth to know, in simple words
Charge controller - high-quality PV charge controller is the most important component within the PV off-grid systems. Controls the flow of current to and from the battery, to protect it from over charging after reaching the required voltage within the battery (eg protect against boiling the electrolyte). The over-discharge protection occurs, when the loads will cause critical/min voltage within the battery. The deep discharge protection is an optional feature (but very common), helps to protect the batteries against damage (fully discharged battery may cause its damage).
Do not exceed the allowed voltage and current of charge controller. Voltage refers to PV panels Voc and current, its Isc. Calculate panel Voc x1.2, the Isc x1.25 - for safe buffer under extreme weather conditions (more than STC: 1000W/25C/1.5AM).
Example: if in the PV solar panel datasheet defined voltage 30Voc, calculate it as x1.2. Thus possible (~max) occurring 36V. This same in case of panel's Isc, if defined as (eg) 8A calculate as x1.25 and possible occurring may be 10A. If an PV string will be created and in series connected (several modules in section) the voltage and current adds up (!). This is especially important while selecting the PV charge controllers (its max allowed parameters). In this case for an PV module with 30V/8A, the needed charge controller should withstand 36V and 10A.
For Phocos PWM charge-controllers the max allowed Voc is 41/52Voc in 12/24V systems, and 95Voc for the MPPT and 90Voc for MPS charge controller.
PV modules - Buy a good one, failure of one PV module can mean failure of whole system.
Batteries - are the weakest point within the PV off-grid systems. Important characteristic is the allowable discharge level (%) of its full charge of capacity (Ah) and the number charging cycles.
System design (main steps):
1. Determine your power consumption (Wh per day/week)
2. Sizing the PV Modules/Generator (Wp)
3. Sizing the DC charge controller or AC inverter (A, W)
4. Sizing the batteries (Ah).
Mounting sequences:
1. Connect batteries to the charge controller
2. Connect PV panel to the charge controller
3. Connect loads to the charge controller.
See more diagrams for PV off-grid systems.
System Components
Charge controllers
The most important component in PV off-grid systems is the charge controller. It is the brain of the system, responsible for: performance, durability and functions. Charge controller, also known as solar regulator, coordinate the main components of any off-grid systems: PV generator, batteries and loads. The common voltages in off-grid systems are 12/24V and 48V, which means the voltage of system batteries.
The most common failure in charge controllers are: burnouts.
The two main types of charge controller are: PWM and MPPT. The difference result from the charging mode. PWM charge controller uses the Pulse-Width-Modulation and an MPPT controller the Maximum Power Point Tracking and enables up to 30% more energy yields, than the PWM controller.
PWM solar charge controller
PWM (Pulse Wide Modulation) charge controller reduces the voltage from the PV module to that of the battery, resulting in a decrease in efficiency. PWM charge controller, works based on 1/2/3 or 4-stage charging method, switching between constant stages according to the occurring PV voltage and current. The efficiency loss depends on the difference size of the voltage, between PV modules and batteries. PWM charge controllers are less expensive (than MPPT) and are an ideal solution for smaller PV systems where the price can be a critical point, or where the maximum efficiency (as in MPPT 98%) and additional power is not really needed.
Sizing an PV system with an PWM charge controller, it is important to consider the open circuit voltage (Voc) of the module. Every charge controller has a maximum input voltage. The PV generator should have a temperature compensated Voc less, than the max. input voltage of the controller. During PWM switching cycles, the controller is exposed to the open circuit voltage (Voc). Using higher Voc, than the controller max. allowed input voltage (Voc), will damage the charge controller.
In PWM charge controller the max. PV voltage (Voc) can not exceed:
for 12V systems = 41V (max panel Voc)
for 24V systems = 52V (max panel Voc)
and results from: min battery voltage + 30V. Above 41/52V it will be critically. This rule applies to Phocos PWM charge controllers in 12/24V systems, but also to the most common charge controllers based on PWM charging method.
To reach the optimal efficiency of an PWM charger controller, the upper limit of the PV rated power is at around 130-150Wp. However the PV rated power (at STC) will be reached only several times in a year, at extremely hot summer days, and more probably at very sunny cold winter days.
Sometimes users choose consciously bigger PV modules (rated power) for higher energy yields at weak solar irradiance. The PV systems works approx 60-70% of its annual average working time at 60% of rated power (in Central Europe). In this case the system will work proper, also with PV modules at higher rated power (~200Wp), but the critical point is, not to exceed the allowed Voc and Isc of the connected charge controller. This can happen in winter at lower temperature under intensive sunshine, or in PV systems installed 1.500m above see level (if yes, then requires derating of nominal parameters of applied PV inverter or charge controller). That's why it is important to calculate the PV module or string Voc and Isc at 120% (x1.2) where additional 20% are buffer and corresponds to extreme weather conditions in low temperature ranges.
At hot summer days this problem may also occur, but decreases due the temperature coefficient. Higher module temperature decreases its rated power at around 0.4-0.5% for every 1C over 25C. In praxis in hot summer day and 60C surface temp. of an 100Wp module, he will work at around 83Wp and the 17W are losses due to the temperature coefficient. As result the Voc and Isc of the PV module in hot summer days will be less.
Systems with slightly oversized PV modules (~190-200Wp) and an PWM charge controller, will be not able to use the max. PV rated power at full sunshine, but they will operate optimally under cloudy weather conditions, typical for central European locations. The another reason for such solution is the possibility of use an high quality 190Wp PV module which probably will be at similar price, as an 130Wp PV module, which are less common.
An very safe rule says: calculate 30% safety buffer (especially in off-grid systems). Then if an 20A charge controller, withstands up to 52Voc (in an 24V battery system), the parameters of desired PV panels should be calculated ca -30%, about 14A/36Voc, with respect to the system safety. Another part is system efficiency, if highest efficiency is required, choose the MPPT charge controller.
MPPT solar charge controllers
They are two fundamental advantages (comparing to PWM controllers): system efficiency and applicable for big PV panels.
The MPPT charge controllers allow PV modules to operate at their higher optimum voltage in varying light conditions: summer, winter, morning, noon, cloudy etc. The MPPT charge controller takes the voltage output of the solar panels and compares it to the battery voltage. It figures out what is the best voltage to get maximum current (A) into the battery. Or said in another way, the MPPT controller tracks the best voltage level and then down converts it to the voltage of batteries. MPPT (Maximum Power Point Tracking) charge controller calculates in real-time the optimal charging parameters, continuously by its internal algorithm. MPPT tracking of the optimal power point, improves performance by as much as 30% (annual energy production), compared with the PWN charge controller.
PWM (Pulse Wide Modulation) charge controller, works based on 1/2/3 or 4-stage charging method, switching between constant stages according to the occurring PV voltage and current.
The MPPT charge controller are most effective in following conditions:
in cold weather, cloudy or hazy days (fall/winter/spring) and in low temperature conditions. PV module works better at cold temperatures and MPPT is utilized to extract the maximum power available from the module
when battery is deeply discharged: MPPT can extract more current (A) and charge the battery, if the state of charge in the battery is lower.
For Phocos MPPT 100/30 charge controller the max. (connectable) PV voltage is 95Voc, and enables connecting up to 450Wp PV rated power in 12V systems, and up to 900Wp in 24V systems.
For Phocos CIS-MPPT 75/20 waterproof charge controller the max. (connectable) PV voltage is 75Voc, and enables connecting up to 250Wp PV rated power in 12V systems, and up to 500Wp in 24V systems.
The MPPT 100/30 charge controller is available within the Modular Power Management (MPM) system, with additional components:
MCU as central unit, coordinates up to 16 MPM components (MPPT, MPS, MCS)
MPS as deep discharge protection, or PWM charge controller, alternative dump-load in hybrid systems
MCS for external generators like wind- or hydro turbines.
The PV module or string Voc and Isc multiplied by x1.2 and x1.25 can not be higher then the max allowed current (A) and voltage (V) of the charge controller. The upper limit of the maximum Voc and current (A) should be defined in the datasheet of the controller. For MPPT 100/30 according to 95V and 30A, and for the CIS-MPPT 75/20 according to 75V and 20A. If in the datasheet only the max voltage and current defined, then in the most cases it means Voc and Isc, of the PV generator.
Wiring and voltage management (connection in series and parallel)
Connecting several PV modules in string (section), the system voltage can be minimized by parallel connection. In series connection the voltage (V) will be added up. Connecting panels parallel, the voltage (V) will remain the same. Especially important in off-grid systems, where the max. PV voltage may have an significant influence on system efficiency and system design and can not be exceeded. Parallel connections are typical in off-grid systems, to minimize the PV voltage. Here an example for two PV modules (16V/2.5A):
The maximum allowed voltage (at the PV charge controller) can be controlled by appropriate connection type of the PV modules (in series or parallel).
PV solar panels
In sizing and operating of PV off-grid systems and according to the risk and efficiency, PV modules have secondary importance, but they are the heart of a any PV system. Dysfunctions of PV modules are rare and even if occur, are noticeable over long time, years and seldom results in immediately system shutdown. Important parameters of PV modules are:
Voc (open circuit voltage) and Isc (short circuit current) - of any PV module or string can not exceed, the allowed input voltage and current of charge controller or PV-inverter. The thereby resulting possible damages on charge controller or inverter are not covered by the warranty. Voltage (Voc and Vmp) can be managed by appropriate wiring of the modules, within string. When modules connected in series, the PV voltage (V) will be added up. If modules are connected parallel, the voltage (V) stay at the level of one module, but the current (A) adds up.
Isc - is maximum amperage generated by a PV panel exposed to sunlight. The PV circuit's wire size and overcurrent protection (fuses and circuit breakers) calculations are based on panel Isc (A) and should be rated as minimum 125% of the rated power of the charge controller. For an 30A controller, the max. allowed PV current (Isc) will be 24A (23A x 1.25 = 30A).
Vmp - is the voltage, where a panel outputs the maximum power. Vmp should be higher than (but optimally close to) the maximum battery voltage.
PV technologies - have different voltage characteristics. For example thin-film modules operate at much higher voltage, which can be an challenge for off-grid systems (concerns modules <100Wp).
One of the well known quality problems, especially in PV off-grid solar panels, are so called micro-cracks. The microcracks problems are typical for low-quality PV modules, which are often not subject to strict quality controls. An thermovision-test may cost more than the PV module, and the energy yield will be probably in the summer months capped by the charge-controller, if battery full charged. So eventual technological losses in PV off-grid modules are difficult to recognize, especially in the first years of usage. That is sometimes the reason why off-grid modules have 5-10 years warranty on rated power, compared to on-grid modules with 25 years. All depends on quality and price, and if two visually identical PV modules are considered, an top-quality and an no-name PV module, the difference in quality can be not recognized, by anyone. It would be visible in a thermovision-test and looks like this:
That is why, we recommend to use high-quality PV modules, if the mounting surface (area) allows, take proven and stable PV on-grid modules, optimally with MPPT charge controller for highest efficiency and long term trouble free operation.
Batteries
There are two basic types of batteries that are available for use in a standard solar energy production system: sealed batteries (AGM or Gel cell) and flooded lead acid (FLA) batteries. Sealed batteries require only little maintenance in order to keep them working properly, the FLA batteries have a longer lifespan.
Deep-Cycle Batteries
A cycle in a solar battery occurs when it is discharged and then recharged back to its full level. How much a solar battery is discharged, is called the depth of discharge.
Deep cycle solar batteries are designed to be repeatedly discharged and recharged in cycles, where up to 80% of the battery capacity is used up. Deep cycle solar batteries are dedicated for solar PV systems and in systems above approx 200Ah capacity, the only right choice. A shallow-cycle-battery is when the 20% or less of the battery capacity is discharged and recharged. Shallow cycle batteries are designed to give up lots of power over a short period of time. They are used in cars and vehicles and are less suited for PV off-grid systems.
Similar like in PV modules, proper connecting wiring of batteries influence the system voltage. In series connected two batteries with 12V, will be an battery-bank with 24V voltage. In large scale projects usually are used 2V or 6V batteries, connected in series to build up an 24V or 48V system. Then (mostly) converting to an 230V-AC current. The less voltage differences 48V-DC/230V-AC, the higher the system efficiency, in an 12V/230V system, the losses will be the highest.
Batteries connected together to a battery-bank, should have the be the same batteries types and capacity. An important influence on the battery is its ambient temperature, ideally at about 10-20C. Their ventilation and storage. In extreme cases, low quality batteries can catch fire, that is why an appropriate ventilated and fireproof boxes are important.
A fuse between battery and charge controller (inverter) may be very useful, and is necessary in middle and large off-grid PV systems. The fuse parameters are related to the charging current and load current within the system and battery.
In large scale PV off-grid projects the batteries connected in series, will "learn each other" at the first years of usage and the whole system operates at the first months or even years under such learning process, controlled by an PV off-grid inverter (converting DC>AC) and charge controllers on the DC>DC site.
For your PV off-grid system you will need deep cycle batteries. These are designed with thicker plates for constant deep discharging and recharging. This is different than a car battery which is designed to provide a high burst of power for a short time.
Maintenance, basics
check the batteries temp. and voltage
check the overvoltage and deep discharge protection, works correctly? (on/off switching)
check the connections, cables and connectors, no loose parts? (in the most systems, very common problem)
for horizontal mounted PV modules (eg. on the camper roof) check the dirtiness and clean it if needed
visual check of system components (significant discolorations, cables, connectors, charge controller port).
System design, basics
(see our PV calculator, also for PV off-grid systems)
1. Determine the demands of power consumption (Wh)
The first step in designing a solar PV system is to find out the total power and energy consumption of all loads that need to be supplied by the solar PV system as follows:
1.1 Calculate total Watt-hours (Wh) per day for each appliance used.
Add the Watt-hours needed for all appliances together to get the total Watt-hours per day which must be delivered to the appliances.
1.2 Calculate total Watt-hours (Wh) per day needed from the PV modules.
Multiply the total appliances Watt-hours (Wh) per day x1.3 (the energy lost in the system) to get the total Watt-hours per day which must be provided by the panels.
2. Sizing the PV modules (Wp)
Different size of PV modules will produce different amount of power. To find out the sizing of PV module, the total watt peak (Wp) produced needs. The peak watt (Wp) produced depends on size of the PV module and system location. We have to consider “sunlight factor” which is different in each site location. For central europe the factor is around 3, and corresponds to about 3 hours of sunlight, per day, expected average over the whole year (including in the winter time).
To determine the sizing of PV modules, calculate as follows:
2.1 Calculate the total Watt-peak rating needed for PV modules
Divide the total Watt-hours per day needed from the PV modules (from item 1.2) by 3 to get the total Watt-peak rating needed for the PV panels needed to operate the appliances. The factor 3 corresponds to the day-hours sun radiation under central european conditions and all season working mode (also winter), if PV system working in spring-summer-autumn the factor will be around 4-5 and for systems working only in summer, around 6-7 hours sun per day (factor=6 to7).
2.2 Calculate the number of PV panels for the system
Divide the answer obtained in item 2.1 by the rated output Watt-peak of the PV modules available to you. Increase any fractional part of result to the next highest full number and that will be the number of PV modules required.
Result of the calculation is the minimum number of PV panels. If more PV modules are installed, the system will perform better and battery life will be improved. If fewer PV modules are used, the system may not work at all during cloudy periods and battery life will be shortened.
3. Sizing pure sine wave PV inverter (230V/50Hz from 12/24/48V)
An inverter is used in the system where 230V-AC power output is needed. The input rating of the inverter should never be lower than the total watt of appliances. The inverter must have the same nominal voltage as your battery (12/24/48V).
For stand-alone systems, the inverter must be large enough to handle the total amount of watts you will be using at one time. The inverter size should be 25-30% bigger than total watts (W) of appliances. In case of appliance type is motor or compressor then inverter size should be minimum 3 times the capacity of those appliances and must be added to the inverter capacity to handle surge current during starting (first 3-6 seconds).
Example: if total watts (W) of working appliances is 150W, your PV inverter converting the electricity from batteries in 12/24/48V-DC into 230V/50Hz-AC, should be around 200W (150W + 30%).
4. Sizing the battery (Ah)
The battery type recommended for using in solar PV system is deep cycle battery. Deep cycle battery is specifically designed for to be discharged to low energy level and rapid recharged or cycle charged and discharged day after day for years. The battery should be large enough to store sufficient energy to operate the appliances at night, cloudy days and if needed in winter. To find out the size of battery, calculate as follows:
4.1 Calculate total Watt-hours per day used by appliances.
4.2 Divide the total Watt-hours per day used by 0.85 for battery loss.
4.3 Divide the answer obtained in item 4.2 by 0.5 for depth of discharge.
4.4 Divide the answer obtained in item 4.3 by the nominal battery voltage.
4.5 Multiply the answer obtained in item 4.4 with days of autonomy (the number of days that you
need the system to operate when there is no power produced by PV panels) to get the required
Ampere-hour capacity of deep-cycle battery.
Battery Capacity (Ah) = Total Watt-hours per day used by appliances x Days of autonomy (0.85 x 0.5 x nominal battery voltage)
5. Sizing the charge controller (A)
As mentioned above, the solar charge controller is typically rated against Amperage (A) and Voltage (V) capacities. Select the solar charge controller to match the voltage of PV system and batteries and then identify which type of solar charge controller is right for your application. Make sure that solar charge controller has enough capacity to handle the current from PV system.
For the PWM charge controller type, the sizing of controller depends on the total PV input current which is delivered to the controller and also depends on PV panel configuration (series or parallel configuration).
According to standard practice, the sizing of solar charge controller is to take the short circuit current (Isc) of the PV module, and multiply it by x 1.3
Calculations in practice
Example a house has the following electrical appliance usage:
1x 18W lamp with used 8 hours per day
1x 60W fan used for 8 hours per day
1x 75W TV that runs 8 hours per day
The system will be powered by 190Wp PV modules.
ad 1. Determine power consumption demands
Total appliance use =(18W x 5hours) + (60W x 4hours) + (75W x 7hours) =916Wh/day
Total PV panels energy needed = 916x1.25=1145Wh/day [+25% reserve energy and losses]
ad 2. Sizing the PV generator (panels)
2.1 Total Wp of PV panel capacity needed =1145/3=382Wp [factor 3 = average daily solar exposure in hours for central EU location]
Fundamental question: should the PV off-grid system operate over the whole year (summer and winter) or seasonally ?
If seasonally then the amount of solar sun hours should be related to the desired season (in Central Europe in winter about 2-3h up to 6-8h in the summer).
For all-year PV off-grid systems, the average daily solar exposure expressed in hours, should be related to the lowest solar radiation in winter (eg. 2-3 hours). And the daily solar sun exposure (h) will be different for Estonia, Slowenia or Spain, additionally the solar exposure for mountain hut at 2000 above see level will be much higher than in the city.
2.2 Number of PV panels needed =382/190= 2 module
Actual requirement = 2 modules a 190Wp
So this system should be powered by at least 2 modules of 190Wp PV module.
ad 3. Sizing the inverter (DC-230V-AC site)
Total Watt of all appliances = 18 + 60 + 75 = 153W
For safety, the inverter should be considered 25-30% bigger size.
The inverter size should be about (153 x 1.3) 200W or greater.
ad 4. Sizing the battery
Total appliances use = (18W x 5 hours) + (60W x 4 hours) + (75W x 7 hours)
Nominal battery voltage: 12V
Days of autonomy: 3 days
Battery capacity = [(18W x 5 hours) + (60W x 4 hours) + (75W x 7 hours)] x 3/(0.85 x 0.5 x 12) [losses, ratio discharge of battery, voltage]
Total Ampere-hours required: 538 Ah
So the battery should be rated 12V and 538Ah for 3-day autonomy
So the battery should be rated 12V and 179Ah for 1-day autonomy
The main point here is the allowed discharge level of battery (here 50%) if more, the needed capacity (Ah) significant less.
ad 5. Sizing the charge controller
According PV energy demands from above, 2x 190Wp (eg. GermanSolar GSP6 Premium Line) and technical specifications:
Pm = 190Wp
Vmp = 24.77V
Imp = 7.68A
Voc = 31.15V
Isc = 8.28A
A (current)
The rated current for solar charge controller = (2 x 8,28 A) x 1.25 = 20A [25% safety buffer]
The solar charge controller should be rated at 20A or greater and would be a little undersized, but OK.
V (voltage)
The PV voltage (Voc) of 2x190Wp panels, connected parallel (!) will be 31.15, multiplied x1.2 = 37Voc.
The max allowed voltage within an 12V PWM charge controller is 41Voc, and will be not exceeded (37V), thus is OK.
According example above (2x190Wp) an 20A PWM charge controller for 12V system should be chosen. And will work optimally at slightly cloudy weather, typical for central European location.
Basics of Solar PV System Design
Posted on February 21, 2013 by Goodpal
An example load calculation
A successful design involves accurate knowledge of daily electrical load calculation and accounts for all worst case scenarios which might possibly occur during operation. A good designer will be pragmatic and keep the costs down by cutting on unnecessary over sizing the system. In the example of a typical middle class home (shown at the left) all the lights have been replaced with LED lights which consume far less electricity compared with the usual CFL lights or tubelights. This lowers daily power consumption which enables you to manage with smaller solar PV system. It would have been still better if the fans were also replaced with energy efficient fans. In India, Crompton Greaves will soon begin offering 1200 mm ceiling fans (MAXIMUS) that will consume just 35 watts!! The production is expected to start in March-April 2013. USHA has a 45 Watt ceiling fan (Technix). If such fans are installed the PV system size will be further reduced (which means still lower investment!).
For energy efficient fans, please check out this page on Super Fans: Super Efficient Fans. it was pointed by a reader commenting below.
Step 1: Calculate Total Power Consumption
The first step in designing a solar PV system is to find out the total power consumption in watt-hours. It involves multiplying the wattage of each appliance with the number of hours it runs daily and adding them all. The side image shows how it can be done. We shall use it as an example here. So, the total daily power consumption is 4300 wh.
Step 2: Sizing the PV Modules (Wp)
Besides solar panels which generate photocurrent, a solar PV system is made up of many components – charge controller, inverter, batteries – all connected by wires. None of these are 100 percent efficient. For instance, every 100 amp-hour drawn from the battery requires putting in about 115-120 amp-hours of charge into it. Inverters are typically only 85 percent efficient and likewise for charge controller. Cables offer electrical resistance to the flow of current which is substantial because of rather low DC voltages involved. People try keeping it low by working with higher DC voltages where possible and yet keep wiring cost and resistance losses low (say less than 3%). Therefore, in order to account for all such losses the modules must put in some extra energy into the system; not merely the daily watt-hour load.
We can guess this extra amount if we assume say 80% efficiency for the inverter/charge controller, 85% for the battery bank and 3% wire losses. Thus, we must over size the requirement from the modules by 1/(0.80 x 0.85 x 0.97) or by 1.51 or simply 1.5.
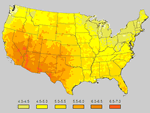
So, energy needed from the modules for our example house is about 4300 x 1.5 = 6450 wh. During the daylight hours modules must produce at least this much energy. This brings in the concept of “peak sun hours” into the picture. Since solar modules are characterized for 1000 W/m2 (1 kW/m2) of solar radiation intensity, it is useful to represent the daily solar radiation in terms of “number of hours” of 1000 W/m2. Thus, a 5 kW/m2 of daily average solar insolation is equivalent to 5 hours of 1000 W/m2 solar intensity. Monthly averaged daily solar insolation data (maps and data in Microsoft excel worksheet) are available from the MNRE website for Indian locations. These daily “sun hours” help you figure out the peak watt requirement from the panels.
For example, in New Delhi the number of average daily sun hours is 5.5 for modules mounted horizontally and 6.2 when the modules are mounted at the latitude angle of Delhi which is about 28 degrees. Although modules should be ideally inclined at the latitude angle facing south in India (so that sun rays fall normally on the solar modules), but the table at the left shows the difference is not highly significant. A good way to harness the maximum solar energy from the modules is to change the angle of inclination twice during an year – in March for summer angle (generally 15 degrees less than the latitude) and in September for winter angle (typically 15 degrees more than the latitude). This can be easily done for small systems.
If the house is located in Delhi, we can assume 5.5 hours of daily sunshine. So the peak watt rating of modules for our system will be 6450 / 5.5 = 1173 Wp – rounding it up, 1.2 kWp modules will be required. If you want to be more liberal use 5 sun hours; it gives 6450 / 5 = 1290 Wp or 1.3 kWp. Thus, there is no rigid formula for system designing; the only thumb rule is to be “somewhat liberal” depending upon your pocket size.
For most locations in north India, one can assume 5 – 5.5 daily sunshine hours.
Step 3. Inverter Sizing
An inverter is used in the PV system when 220V-AC power output is needed. Its rating should never be lower than the total watt of appliances and input DC voltage (12V/24V/48V) must match the voltage of the battery bank. The inverter size should be generally 25-30% bigger than total watts (W) of appliances. If the load includes an appliance such as motor or compressor then inverter size should be minimum 3 times the capacity of these appliances so that it can handle the starting surge current for few seconds.
For example, if total wattage all appliances is about 500W (as is the case in our example home), the inverter size should be around 650W.
Step 4: battery Sizing
The battery bank should be large enough to provide the desired backup. Battery capacity calculation involves accounting for battery losses (typically 15 percent), maximum allowable depth of discharge (DoD) and days of autonomy. Although the deep cycle batteries can be occasionally discharged up to 80 percent, but for longer life it is better to keep the routine discharge limit to only 50 percent. Given the unpredictable nature of PV systems, once in a while batteries pay visit to the 80 percent limit of DoD.
Not all the energy generated by the panels will be stored in the batteries. Some part of the daytime load will receive power directly from the panels through the inverter (power conditioning unit). What is not consumed will be diverted to the batteries.
Let’s assume that for average 5.5 hours daily the working appliances receive power directly from the panel through the inverter. In summer months, it can be assumed that for 5.5 hours all the daytime load of fans, TV and the laptop receives power from the panel; this is 400W for 5.5 hours or 2200 wh. Thus, energy only for the remaining 2100 wh (of the total daily 4300 wh) needs to be stored in the batteries.
Now again we must account for efficiencies of batteries’ discharge and inverter/charge controller: 1/ (0.85 x 0.80) = 1.47 (or simply 1.5). Thus, the storage required is 2100 x 1.5 = 3150 wh. This much stored energy will be drawn daily from the batteries.
In Delhi the temperature goes down to 3˚C in the winter. Inside home where batteries will be located is expected to be around 10˚C. Battery capacities are generally rated for 25˚C. So a drop of 15˚C will reduce the battery capacity by about 10%. Applying this correction: 3150 / 0.90 = 3500 wh.
If the system is designed for DC 24V, then the daily amp-hour capacity needed is 3500 wh / 24V = 146 Ah. For 50% allowable discharge we get 292 Ah. Therefore, a 24V 300 Ah battery bank should provide sufficient backup.
Summarizing:
Designing a solar PV system involves first calculating the average daily energy consumption in watt-hours. As a simple rule, overrate the daily Wh load by 1.5 for panel capacity. Likewise overrate Wh load to be stored in the batteries also by 1.5 for battery sizing. For better accuracy of design get the actual efficiencies of the charge controller, inverter, batteries and cables to be used.
Features of the system design here are
Maximum daily energy consumption is 4300 Wh.
Maximum allowable load at any point of time is 500 W.
When fully charged, the battery bank can support the daily usage of 4300 Wh.
Charge depletion of the batteries will be replenished on a clear sunny day.